The web service graphical user interface (GUI) is a tool that allows to construct complex web service configurations in a friendly and nice interface. It allows to:
Create and Delete web services.
Import and Export configurations (in YAML file format) for existing web services.
View, Revert and Export old configurations for existing web services in the Web Service History screen.
Track all communication logs for each web service in the Debugger screen.
The "Web Services" link in the main screen of Admin Interface (in the System Administration box) leads to the web services overview screen, where you are able to manage your web service configurations. You can add new web services or change the configuration of the existing ones from this screen.
Every web service configuration screen has in the upper part of the screen a navigation path in a "bread crumbs" style. This navigation path is useful to know exactly in which part of the web service configuration we are, and also we can jump back to any level of the configuration at any time (this action will not save any changes).
Note
To create a new web service, press the button "Add web service", and provide the needed information.
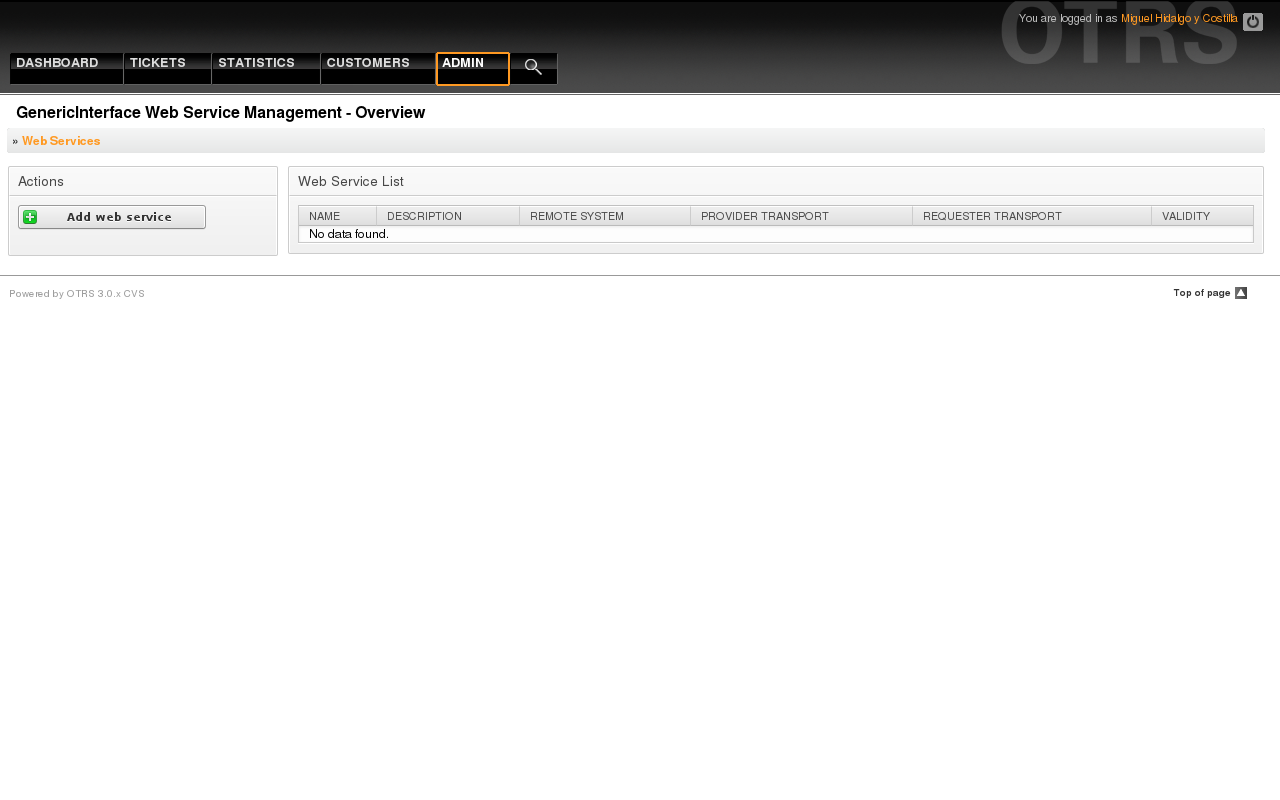
Figure: Web services overview.
The only required field in this part is the web service "Name" that needs to be unique in the system and non empty. Other fields are also necessary for the configuration like the "Debug Threshold" and "Validity" but these fields are already filled with the default value for each list.
The default value for "Debug Threshold" is "debug", under this configuration all communication logs are registered in the database, each Debug Threshold value is more restrictive and discard communication logs set for lower values.
Debug Threshold levels (from lower to upper)
Debug
Info
Notice
Error
It is also possible to define the network transport protocol for "OTRS as Provider" and "OTRS as requester".
Click on the "Save" button to register the new web service in the database or click "Cancel" to discard this operation. You will now be returned to the web service overview screen.
If you already have a web service configuration file in YAML format you can click on the "Import web service" button on the left side of the screen. For more information on importing web services please check the next section "Web Service Change".
Note
To change or add more details to a web service, click on the web service name in the web service overview screen.
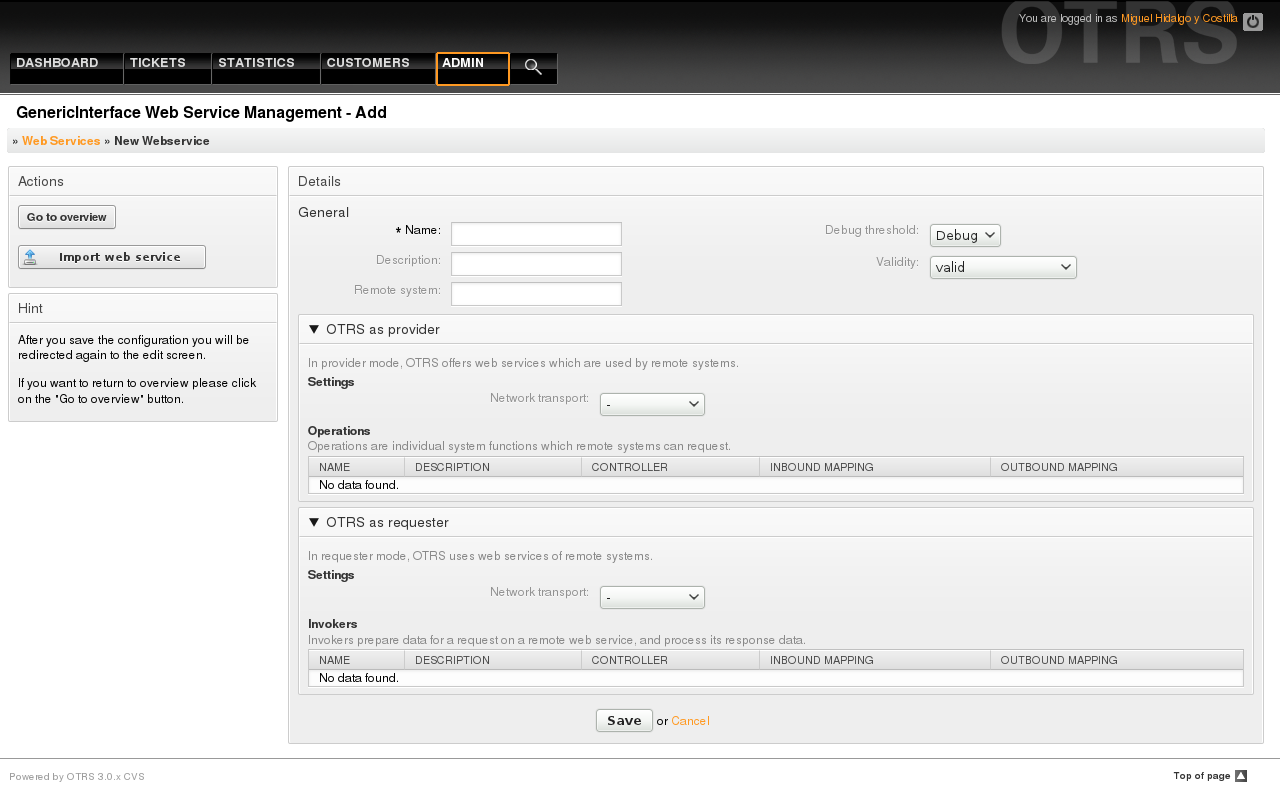
Figure: Web services add.
On this screen you have a complete set of functions to handle every part of a web service. On the left side in the action column you can find some buttons that allows you to perform all possible actions on a web service:
Clone web service.
Export web service.
Import web service.
Configuration History.
Delete web service.
Debugger.
Note
"Configuration history" and "Debugger" will lead you to different screens.
To clone a web service, you need to click on the "Clone web service" button, a dialog will be shown where you can use the default name or set a new name for the (cloned) web service.
Note
Remember the name of the web service must be unique within the system.
Click on "Clone" button to create the web service clone or "Cancel" to close the dialog.
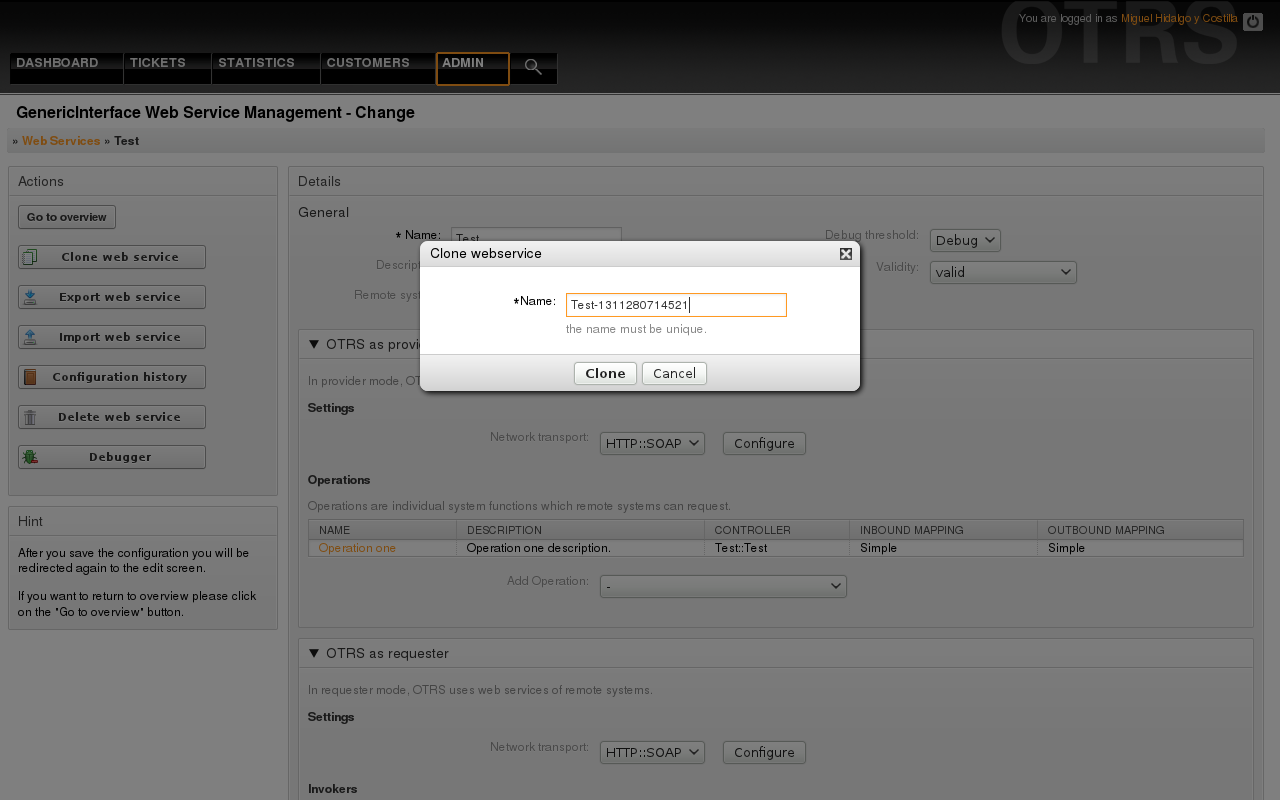
Figure: Web service clone.
The "Export web service" button gives you the opportunity to dump the configuration of the current web service into a YAML file, download it and store it on your file system. This can be specially useful if you want to migrate the web service from one server to another, for example from a testing environment to a production system.
Warning
All stored passwords in the web service configuration will be exported as plain text.
Right after clicking the "Export web service" button a save dialog of your browser will appear, just like when you click on a file download link on a web page.
Note
Each browser on each operating system has its own save dialog screen and style, depending on the browser and its configuration it is possible that no dialog is shown and the file is saved to a default directory on your file system. Please check your browser documentation for more specific instructions if needed.
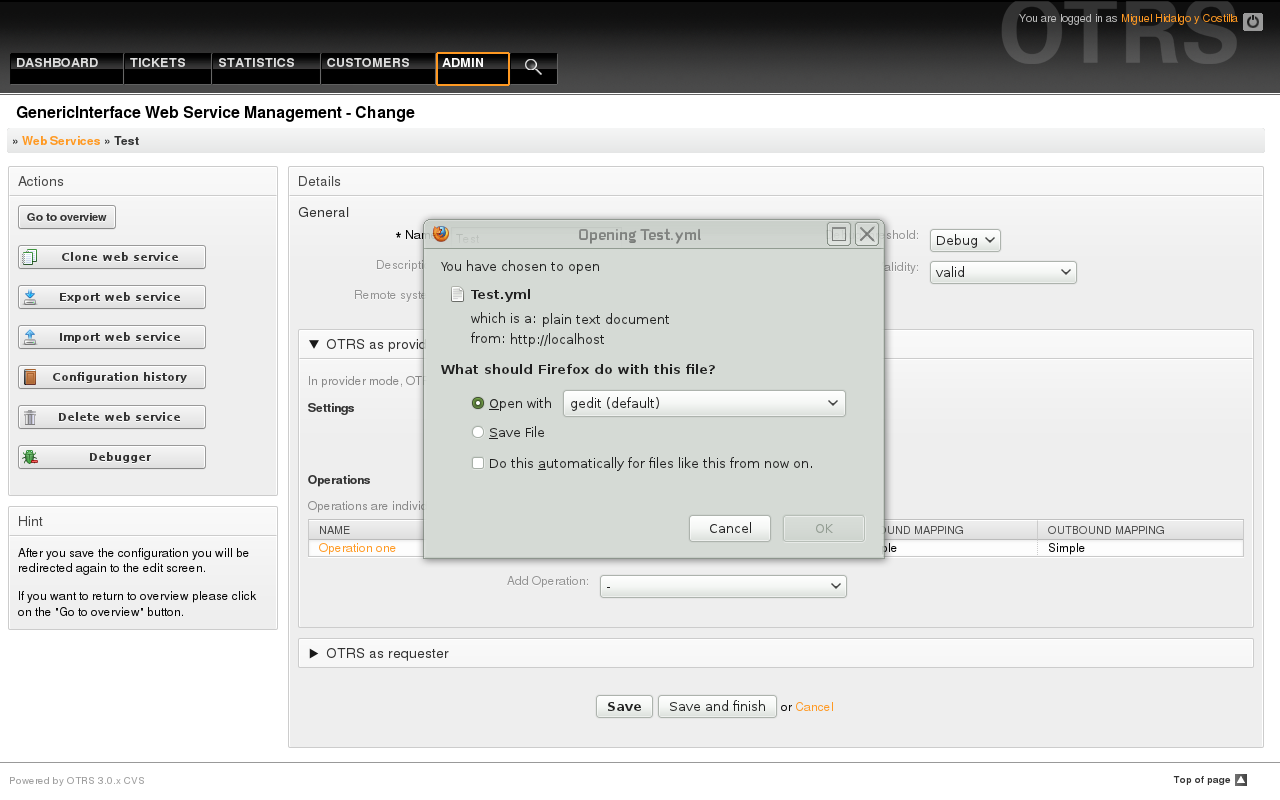
Figure: Web services export.
A valid web service configuration YAML file is required to use the import web service feature. Click on the "Import web service" button, browse for the configuration file or provide the complete path in the input box.
Click "Import" button to create a new web service from a file or "Cancel" to close the dialog.
Note
The web service name will be taken from the configuration file name (e.g. if the file name is MyWebservice.yml the resulting web service will be named MyWebservice). If a web service is registered in the system with the same name as the web service that you want to import, the system will lead you to the web service change screen to let you change the name of the imported web service.
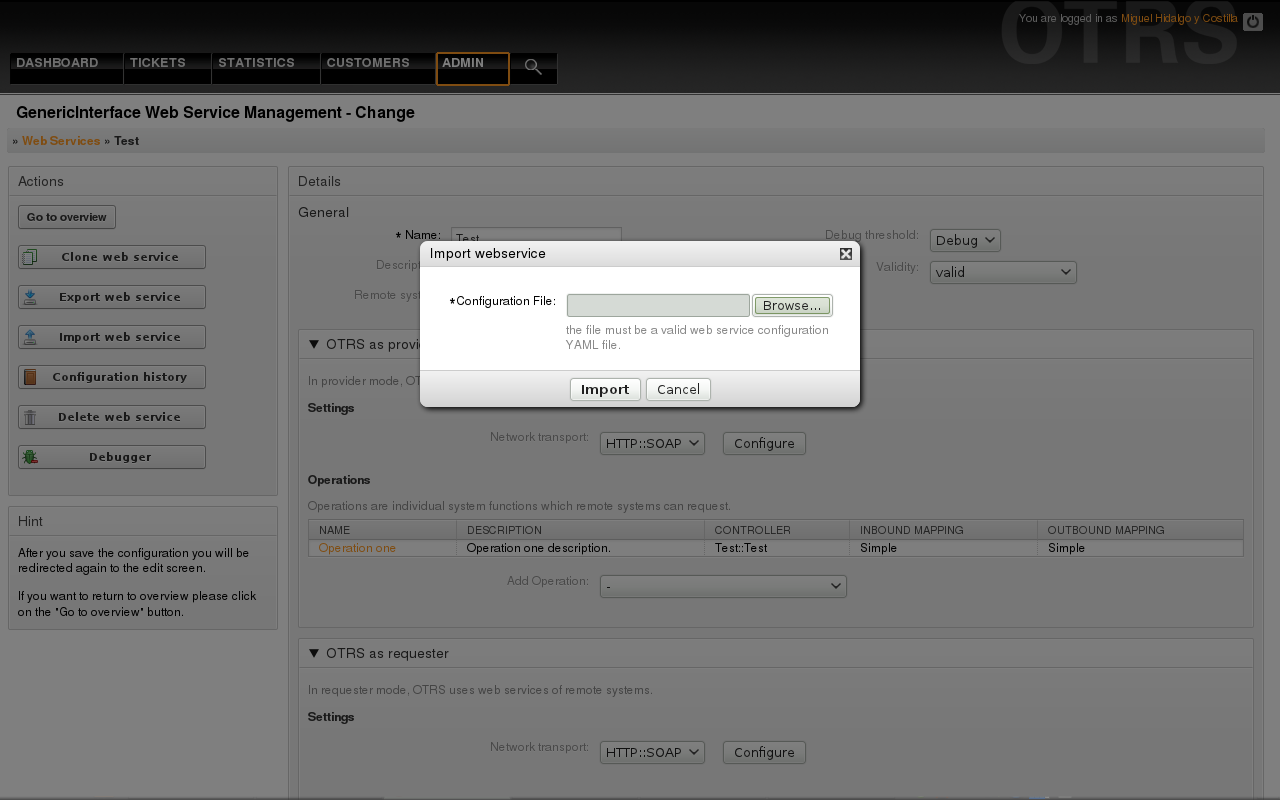
Figure: Web services import.
Every change to the web service configuration creates a new entry in the web service history (as a journal). The web service history screen displays a list of all configuration versions for a web service. Each row (version) in the "Configuration History List" represents a single revision in the web service history.
Click on one of the rows to show the whole configuration as it was on that particular date / time. The configuration will be shown in the "History details" section of this screen. Here you are also able to export the selected web service configuration version or to restore that version into the current web service configuration.
The "Export web service configuration" behaves exactly as the "Export web service" feature in the web service change screen. For more information refer to that section.
If changes to the current web service configuration does not work as expected and it is not easy to revert the changes manually, you can click on the "Revert web service configuration" button. This will open a dialog to ask you if you are sure to revert the web service configuration. Click "Revert web service configuration" in this dialog to replace the current configuration with the selected version, or click "Cancel" to close the dialog.
Warning
Remember that any passwords stored in the web service configuration will be exported as plain text.
Please be careful when you restore a configuration because this can't be undone.
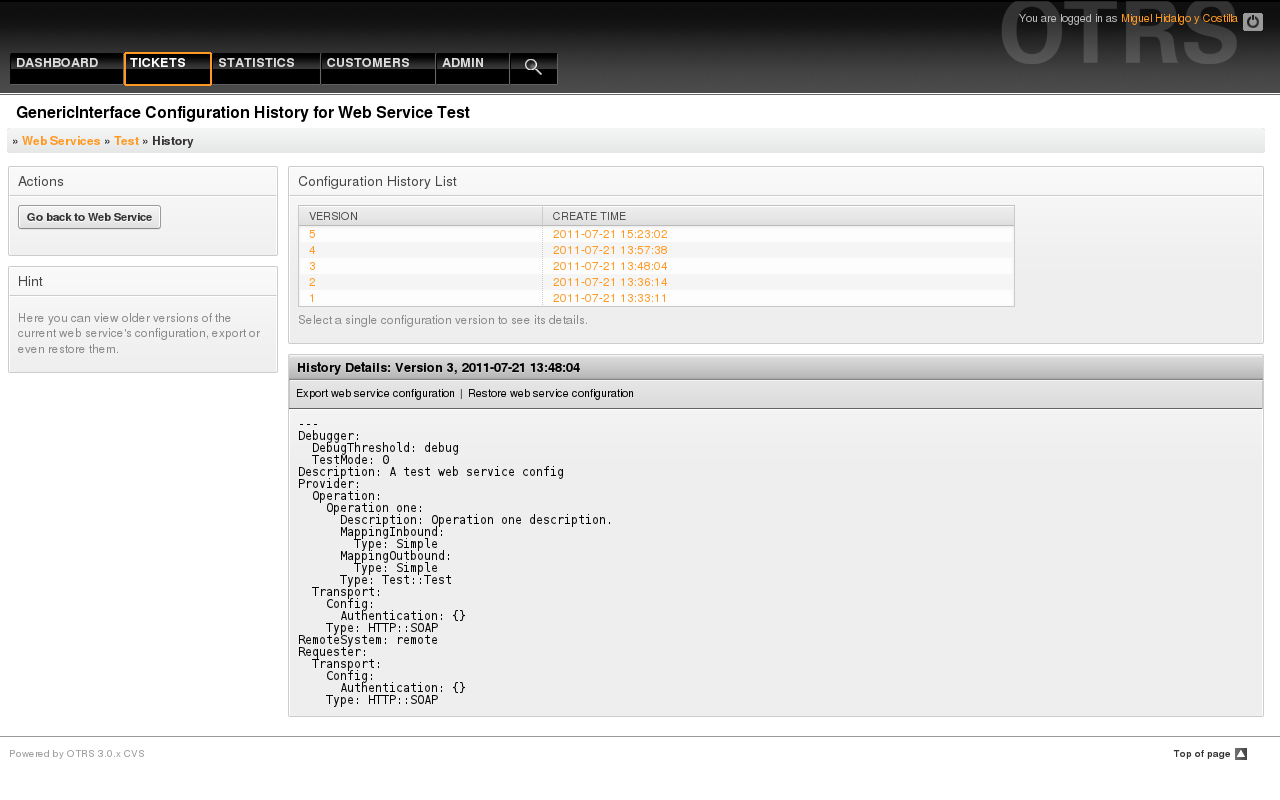
Figure: Web service history.
Sometimes it is necessary to delete a web service completely. To do this you can press on the "Delete web service" button and a new dialog will appear asking for confirmation.
Clink on "Delete" to confirm the removal of the web service or on "Cancel" to close the dialog.
Warning
Delete a web service can't be undone, please be careful when deleting a web service.
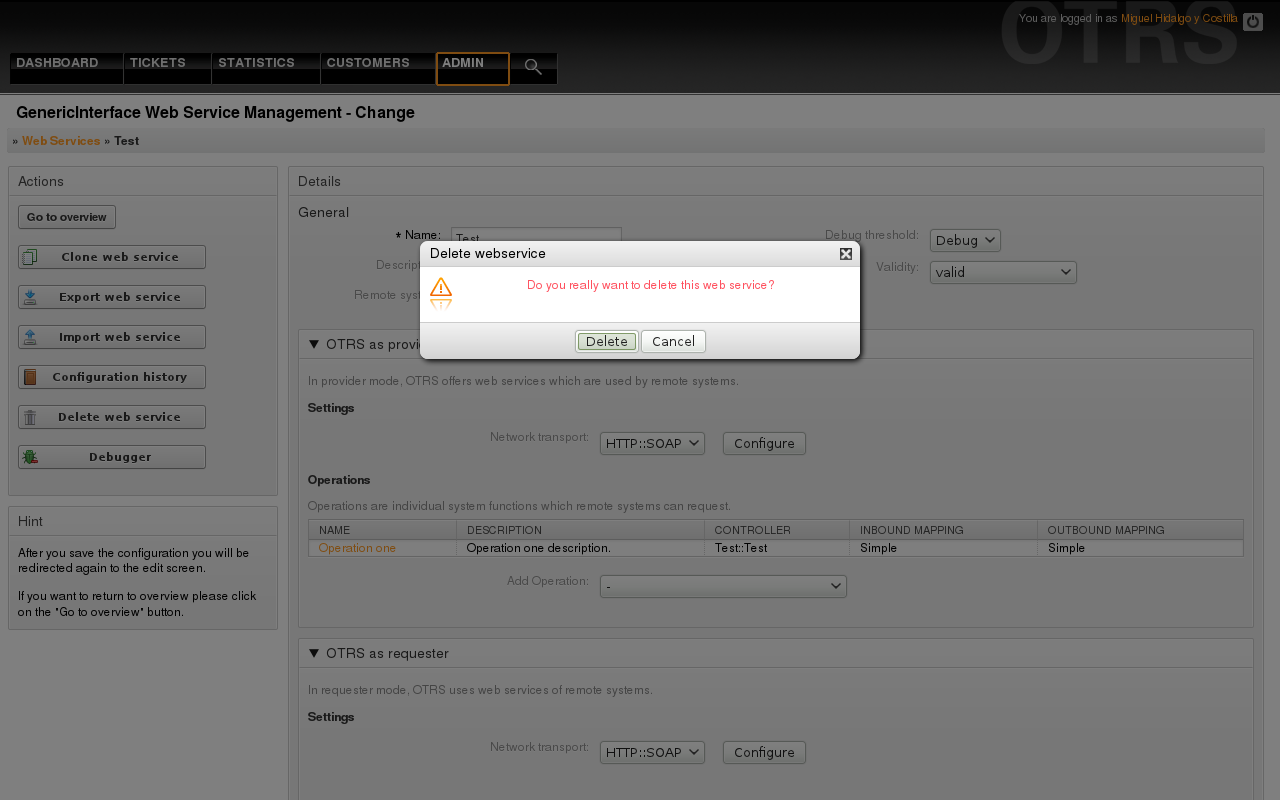
Figure: Web service delete.
The Debugger stores the log of a web service. In the debugger screen you can track all the web service communications for either provider or requester types.
When this screen is shown the request list starts to load. After the list is fully filled you can choose one of the rows (that means a communication sequence) to check its details. This details will appear in a box below.
You can narrow the communication list using the filter on the right part of the screen. You can filter by:
Communication type (provider or requester)
Date: before and / or after a particular date
The remote IP Address
A combination of all.
After filter settings are set, push the "Refresh" button and a new list will be displayed meeting your search criteria.
Note
Depending on the search criteria for the filters the new list could return no results.
On the left part of the screen under the action column you can select "Go back to the web service" or clear the debugger log by pushing the "Clear" button. This will open a dialog that ask you to confirm erasing of the log. Click "Clear" in the dialog button to perform the action or click on "Cancel" to close this dialog.
In the "Request details" section you can see all the details for the selected communication. Here you can track the complete flow and check for possible errors or confirm success responses.
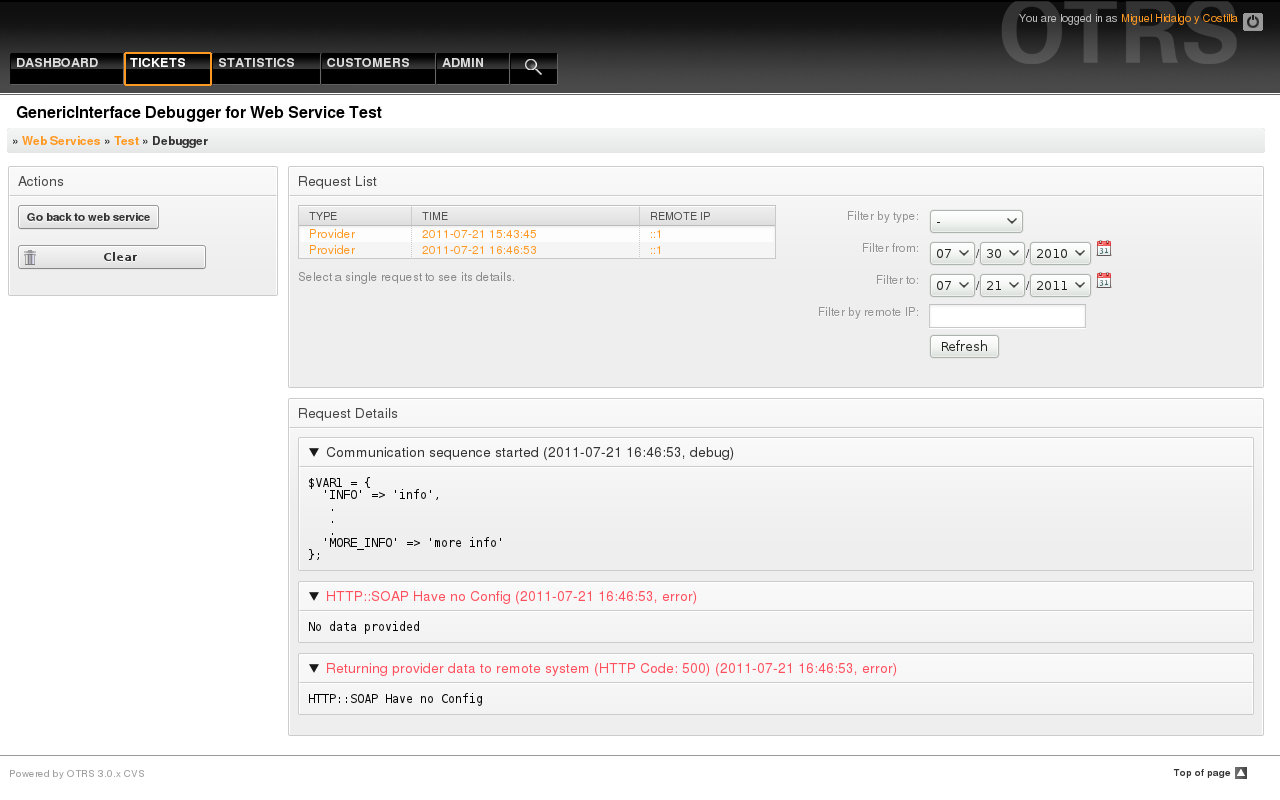
Figure: Web service debugger.
Returning to the web service change screen, now we are going to review the right side of it. Here we have the possibility to modify all the general data for a web service such as name, description, debug threshold, etc. Also there are two more sections below that allows us to modify specific parameters for communication types "OTRS as Provider" and "OTRS as Requester".
The web service configuration needs to be saved on each level. This means that if a setting is changed, links to other, deeper parts of the configuration will be disabled forcing to save the current configuration level. After saving the disabled links will be re-enabled again allowing you to continue with the configuration.
On the "OTRS as provider" section it is possible to set or configure the network transport protocol. Only network transport backends that are registered are shown on the list. To configure the network transport click on the "Configure" button. It is also possible to add new operations in this box. To do this select one of the available operations from the "Add Operation" list. This will lead you to the operation configuration screen. After saving the new operation it will be listed in the table above.
"OTRS as requester" is very similar to the previous one, but instead of "operations" you can add invokers here.
Click the "Save" button to save and continue configuring the web service, "Save and finish" to save and return to the web service overview screen, or "Cancel" to discard current configuration level changes and return to web service overview screen.
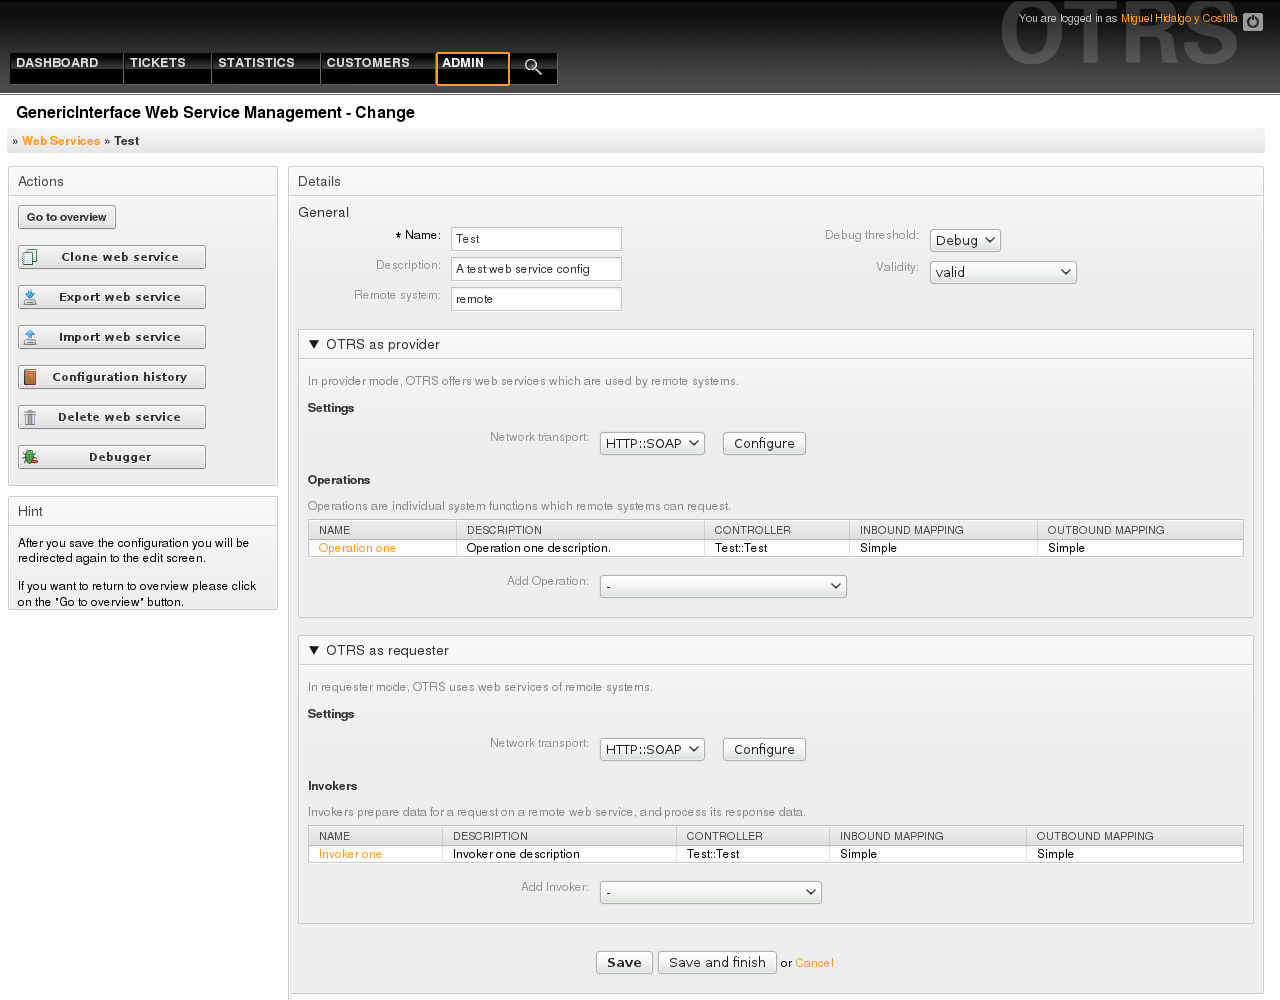
Figure: Web services change.
Note
Like the other Generic Interface configuration screens such as Network Transport, operation, Invoker and Mapping, the initial configuration (add) screen will only present two options: "Save" and "Cancel", when the configuration is re-visited then a new option "Save and Finish" will appear. The behavior of this feature is defined below.
"Save" will store the current configuration level in the database and it will return to the same screen to review your changes or to configure deeper settings.
"Save and Finish" will store the current configuration level in the database and it will return to the previous screen in the configuration hierarchy (to the immediate upper configuration level).
"Cancel" will discard any configuration change to the current configuration level and will return to the previous screen in the configuration hierarchy.
In future the list of available network transports will be increased. Currently only the "HTTP::SOAP" transport is available. Each transport has different configuration options to setup and they might use different frontend modules to configure it, but mostly they should look similar to the "HTTP::SOAP" transport configuration module.
For "HTTP::SOAP" protocol as provider the configuration is quite simple. There are only two settings: "Namespace" and "Maximum message length". These fields are required. The first one is a URI to give SOAP methods a context, reducing ambiguities, and the second one it's a field where you can specify the maximum size (in bytes) for SOAP messages that OTRS will process.
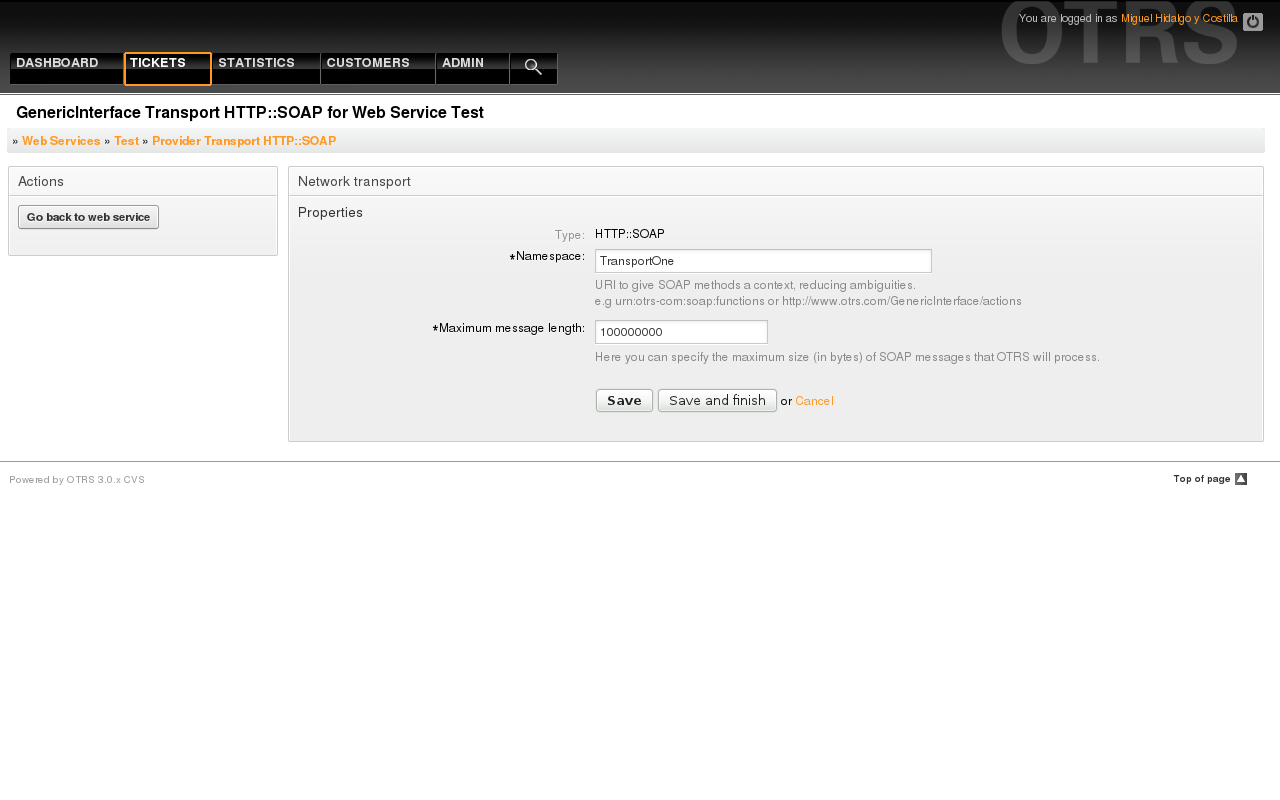
Figure: Web service provider network transport.
The actions that can be performed when you are using OTRS as a provider are called "Operations". Each operation belongs to a controller. Controllers are collections of operations or invokers, normally operations from the same controller need similar settings and shares the same configuration dialog. But each operation can have independent configuration dialogs if needed.
Name, Description, Backend, and Mappings are fields that normally appear on every operation, other special fields can appear in non default configuration dialogs like the Remote System GUID field in SolMan Controller operations.
Normally there are two mapping configuration sections on each operation, one for the incoming data and another one for the outgoing data. You can choose different mapping types (backends) for each mapping direction, since their configuration is independent from each other and also independent from the operation backend. The normal and most common practice is that the operation uses same mapping type in both cases (with inverted configuration). The complete mapping configuration is done in a separate screen which depends on the mapping type.
The operation backend is pre-filled and is not editable. You will see this parameter when you choose the operation on the web service edit screen. The field is only informative.
In the left part of the screen on the action column you have the options: "Go back to web service" (discarding all changes since the last save) and "Delete". If you click on the last one, a dialog will open and ask you if you like to remove the operation. Click on "Delete" button to confirm the removal of the operation and it configuration or "Cancel" to close the delete dialog.
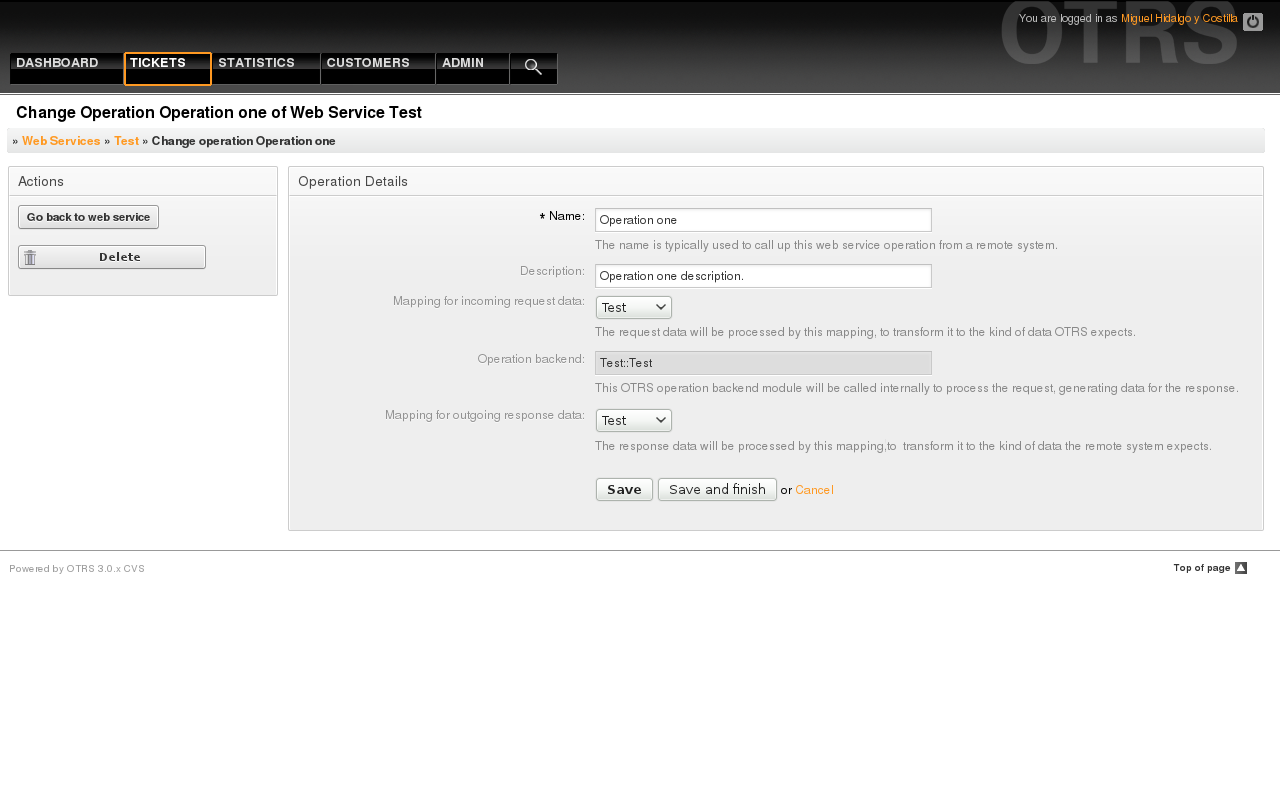
Figure: Web service operation.
The network transport configuration for the requester is similar to the configuration for the provider. For the Requester "HTTP::SOAP" network transport there are more fields to be set.
Apart from the "Endpoint" (URI of the Remote System web service interface to accept requests) and "Namespace" which are required fields, you can also specify:
Encoding (such as utf-8, latin1, iso-8859-1, cp1250, etc) for the SOAP message.
SOAPAction Header: you can use this to send an empty or filled SOAPAction header. Set to "No" and the SOAPAction header on the SOAP message will be an empty string, or set to "Yes" to send the soap action in Namespace#Action format and define the separator (typically "/" for .Net web services and "#" for the rest).
Authentication: to set the authentication mechanism, set to "-" to not use any authentication or select one from the list and the detail fields will appear.
Note
Currently only the "BasicAuth" (HTTP) authentication mechanism is implemented. You can decide whether or not to use it depending on the Remote System configuration. If used, you must provide the User Name and the Password to access the remote system.
Warning
If you supply a password for authentication and after you export the web service to a YAML file this password will be revealed and will be written into a plain text string inside the YAML file. Be aware of it and take precautions if needed.
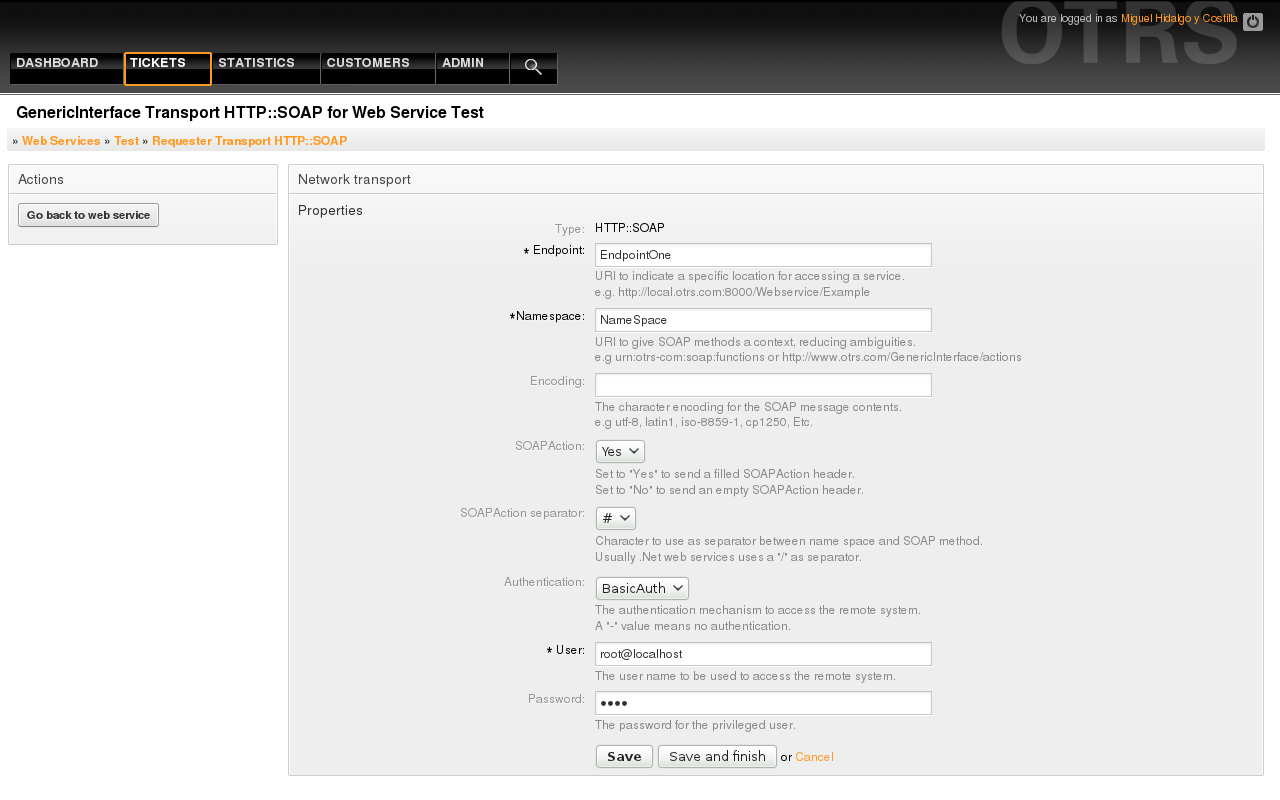
Figure: Web service requester network transport.
The actions that can be performed when you are using OTRS as a requester are called "Invokers". Each invoker belongs to a controller (controllers are collections of operations or invokers), normally invokers from the same controller need similar settings and share the same configuration dialogs. Each invoker can have independent configuration dialogs if needed.
Name, Description, Backend, and Mappings are fields that normally appear on every invoker, as well as the list of event triggers other special fields can appear on non default configuration dialogs like the Remote System GUID field in SolMan Controller invokers.
Normally there are two mapping configuration sections for each invoker, one for the incoming data and another one for the outgoing data. You can choose different mapping types (backends) for each mapping direction, since their configuration is independent from each other and also independent from the invoker backend. The normal and most common practice is that the invoker uses the same mapping type in both cases, with inverted configuration. The complete mapping configuration is done in a separate screen, which depends on the mapping type.
The invoker backend is pre-filled and is not editable. You will see this parameter when you choose the invoker on the web service edit screen. The field is only informative. informative.
Event triggers are events within OTRS such as "TicketCreate", "ArticleSend", etc. These can act as triggers to execute the invoker. Each invoker needs to have at least one event trigger registered, or the invoker will be useless, because it will never be called. The asynchronous property of the event triggers define if the OTRS process will handle the invoker or if it will be delegated to the Scheduler.
Note
The OTRS Scheduler is a separated process that executes tasks in the background. Using this the OTRS process itself will not be affected if the Remote System takes a long time to respond, if it is not available or if there are network problems. If you don't use the scheduler using web services can make OTRS slow or non-responsive. Therefore it is highly recommend to use asynchronous event triggers as often as possible.
To add an Event trigger first select the event family from the first list, then the event name from the second list, then set the asynchronous property (if unchecked means that the event trigger will not be asynchronous) and then click on the plus button. A new event trigger will be created and it will be listed on the invoker "Event Triggers" list.
To delete an Event trigger, simply locate the event trigger to be deleted in the "Event Triggers" list and click on the trash icon at the end of the row. This will open a dialog that ask you if you are sure to delete the event trigger. Click "Delete" to remove the event trigger from the list, or "Cancel" to close the dialog.
In the left part of the screen on the action column you have the options: "Go back to web service" (discarding all changes since the last save) and "Delete". If you click on the last one, a dialog will emerge and ask you if you like to remove the invoker. Click on the "Delete" button to confirm the removal of the invoker and its configuration or "Cancel" to close the delete dialog.
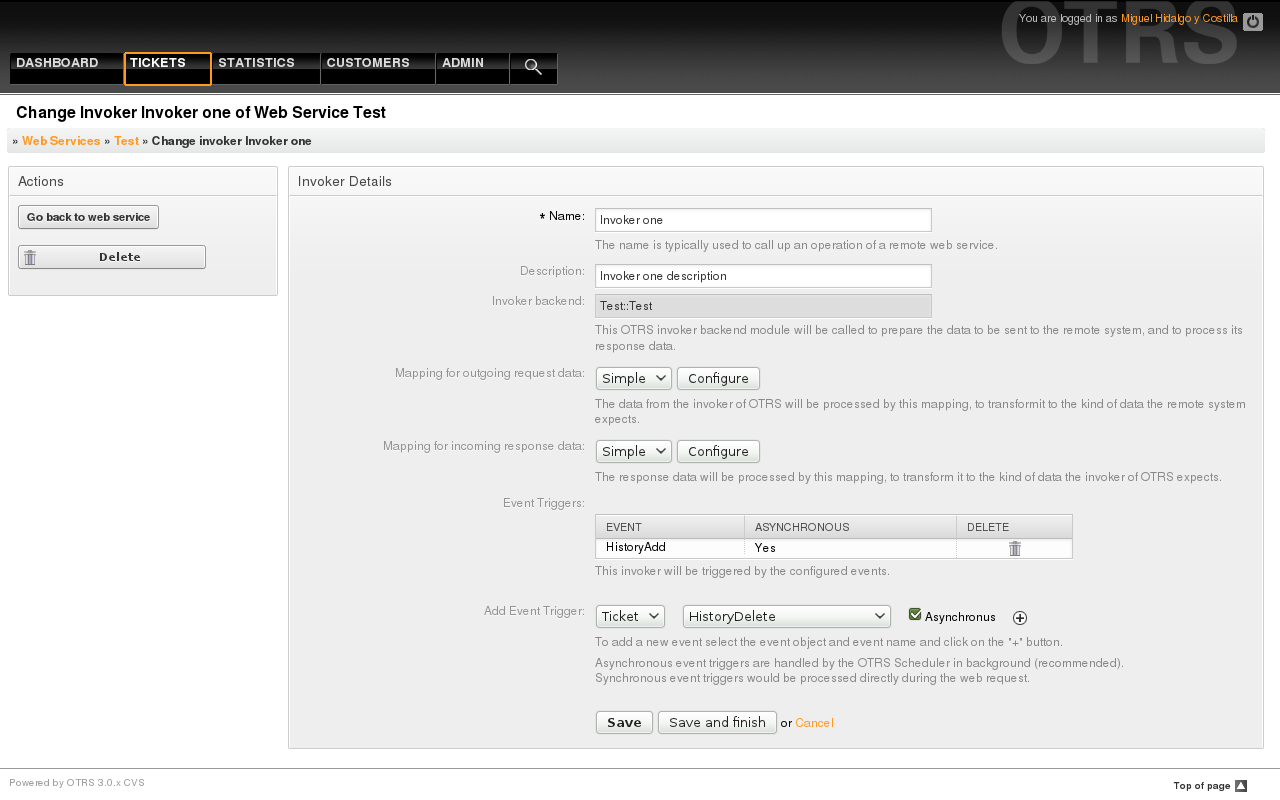
Figure: Web service invoker.
There are cases where you need to transform the data from one format to another (map or change data structure), because normally a web service is used to interact with a Remote System, that is highly probable that is not another OTRS system and / or could not understand the OTRS data structures and values. In these cases some or all values has to be changed, and sometimes even the names of the values (keys) or sometimes the complete structure, in order to match with the expected data on the other end. To accomplish this task the the Generic Interface Mapping Layer exists.
Each Remote System has it own data structures and it is possible to create new mapping modules for each case (e.g. there is a customized mapping module for SAP Solution Manager shipped with OTRS), but it is not always necessary. The module Mapping::Simple should cover most of the mapping needs.
Note
When Mapping::Simple does not cover all mapping needs for a web service a new mapping module should be created. To learn more about how to create new mapping modules please consult the OTRS Development Manual.
This module gives you the opportunity to set default values to map for each key or value for the whole communication data.
At the beginning of the screen you will see a general section where you can set the default rules that will apply for all the unmapped keys and values. there are three options available, these options are listed below:
Keep (leave unchanged): doesn't touch the keys or values in any way.
Ignore (drop key/value pair): when this is applied to the key it deletes the key and value, because when a key is deleted then in consequence it associated value is deleted too. When this is applied to the value, only the value is deleted, keeping the key, that now will be associated to an empty value.
MapTo (use provided key or value as default): all keys and / or values without a defined map rule, will use this as default, when you select this option a new text field will appear to set this default.
Clicking on the "+" button for new key map, will display a new box for a single mapping configuration. You can add as many key mappings as needed. Just click on the "+" button again and a new mapping box will appear below the existing one. From this mapping boxes you can define a map for a single key, with the next options:
Exact value(s): the old key string will be changed to a new one if the old key matches exactly.
Regular expression: The key string will be replaced following a regular expression rule.
Pressing the new value map "+" button will display a new row for a value map. Here also is possible to define rules for each value to be mapped with the same options as for the key map (Exact value and Regular expression). You can add as many values to map as needed, and if you want to delete one of them, just click on the "-" button for each mapping value row.
Deleting the complete key mapping section (box) is possible, just push on the "-" button located on the up right corner of each box that you want to delete.
If you need to delete a complete mapping configuration: go back to the corresponding operation or invoker screen, look for the mapping direction that you select before and set its value to "-", and save the configuration to apply changes.
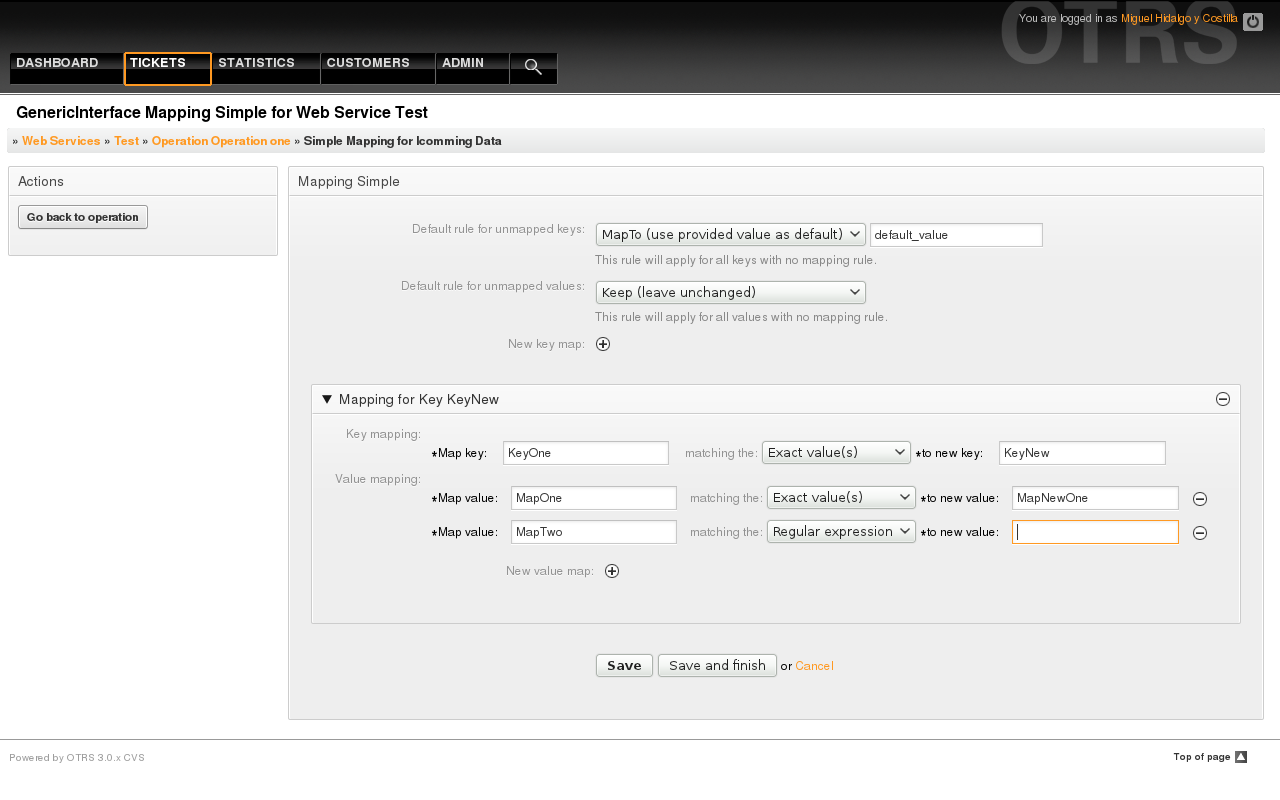
Figure: Web service mapping.